Nội dung
ToggleThe Secret Step Behind Every Perfect Nail
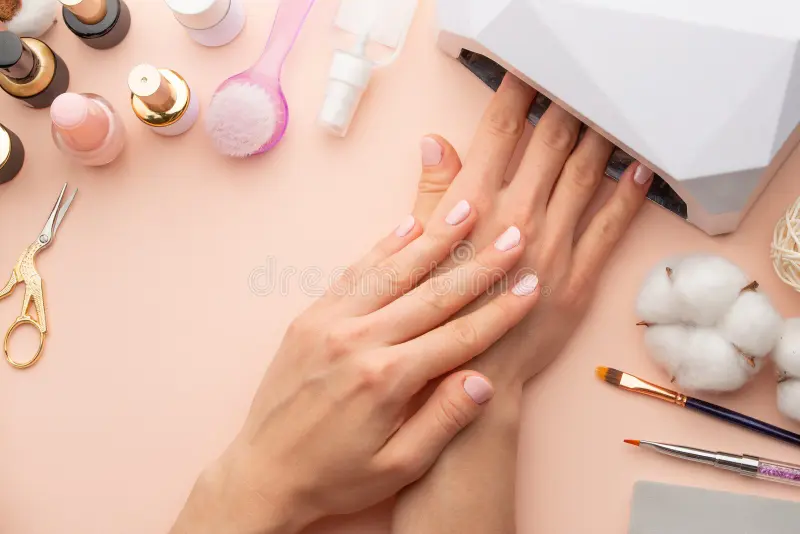
If your manicure never quite looks as smooth and polished as it does at the salon — even when you follow every step perfectly — you might be missing one quiet hero in your routine: the nail buffer.
It’s one of those tools that sits in every nail kit but rarely gets the attention it deserves. Buffers aren’t just about shine — they’re about structure, smoothness, and nail health. Done right, buffing transforms your nails from dull and uneven to radiant, polished, and ready for color. Done wrong, it can lead to damage, thinning, or peeling.
At Meski, we believe great nails start with great prep. And nail buffing is the step that separates the “okay” from the “wow.”
Whether you’re a DIY nail lover or just looking to understand how to care for your nails properly, this guide will take you through everything you didn’t know you needed to know about nail buffers — what they do, how to use them, and why they matter more than you think.
1. What Is a Nail Buffer (and Why You Need One)
Let’s clear the basics first. A nail buffer is not a nail file.
While a nail file shapes the edges, a buffer smooths the surface of the nail plate itself. It’s designed to even out ridges, remove minor imperfections, and create a consistent texture that helps polish apply evenly and stay longer.
Think of it like skincare — your file is your exfoliator, and your buffer is your moisturizer. One reshapes, the other refines.
A good nail buffer can:
Smooth uneven nail surfaces.
Increase shine without polish.
Improve color adhesion for longer-lasting manicures.
Minimize peeling and cracking.
Enhance natural nail health by stimulating surface circulation.
Lorem ipsum dolor sit amet, consectetur adipiscing elit. Ut elit tellus, luctus nec ullamcorper mattis, pulvinar dapibus leo.
|
Tool |
Purpose |
Texture |
Use Frequency |
|---|---|---|---|
|
Nail File |
Shapes nail edge |
Coarse to medium grit |
Every manicure |
|
Nail Buffer |
Smooths nail plate |
Fine to extra-fine grit |
Once a week |
|
Polishing Block |
Adds shine |
Ultra-fine grit |
Once every 2–3 weeks |
Meski tip: Always follow the natural curve of your nail — buffing isn’t about grinding; it’s about gently coaxing the surface into balance.
2. Understanding Grit: The Secret Language of Nail Buffers
Every buffer has a number that tells you how coarse or fine it is — this is called grit. The lower the number, the rougher it is. The higher the number, the finer and gentler the buffer.
Here’s a simple breakdown:
|
Grit Level |
Description |
Use For |
Effect |
|---|---|---|---|
|
80–150 |
Very coarse |
Artificial nails, acrylic shaping |
Not for natural nails |
|
180–240 |
Medium fine |
Smoothing ridges, prepping before polish |
Gentle surface prep |
|
320–600 |
Fine |
Buffing natural nails |
Refines surface texture |
|
800–3000 |
Very fine |
Polishing to natural shine |
Creates high-gloss finish |
If you’ve ever seen a 4-sided buffer, each side is usually assigned to a different grit level — labeled things like “File,” “Smooth,” “Buff,” and “Shine.”
Meski’s Professional Nail Buffer follows this system, giving you a full manicure prep tool in one compact design. Each side has a purpose — from refining edges to creating that natural satin glow before polish.
A good buffer doesn’t just make nails shiny — it helps color last longer by improving adhesion.
3. The Science of Nail Buffing: What Actually Happens
When you buff your nails, you’re lightly smoothing down the top layer of keratin — the protein that makes up your nail plate. The goal is to even out texture and remove small imperfections, not to thin the nail.
Buffing helps by:
Reducing micro-ridges that trap polish and cause streaks.
Encouraging even polish absorption.
Minimizing cracking at the surface.
Stimulating gentle blood flow near the nail bed, promoting healthier growth.
But over-buffing has the opposite effect — too much friction or pressure can cause thinning and weakness. That’s why tool quality and technique matter as much as timing.
4. How to Buff Your Nails Step by Step
Step 1: Clean & Dry
Start with clean, polish-free nails. Make sure they’re dry — water softens the keratin and increases the risk of over-buffing.
Step 2: Shape the Edges
Use a fine-grit nail file to shape your nails first. Buffing is for the surface only, not the edges.
Step 3: Choose the Right Side of the Buffer
If you’re using a multi-sided buffer, follow the order:
1️⃣ File (edge) → 2️⃣ Smooth → 3️⃣ Buff → 4️⃣ Polish
Step 4: Buff Gently and Evenly
Move the buffer in one direction or small circles, not fast back-and-forth strokes.
Apply minimal pressure — let the grit do the work.
Buff each nail for about 5–10 seconds only.
Step 5: Hydrate
Follow with cuticle oil or hand cream immediately after buffing to restore natural moisture.
|
Step |
Tool |
Purpose |
Key Tip |
|---|---|---|---|
|
1 |
Nail File |
Shape edges |
File in one direction only |
|
2 |
Nail Buffer |
Smooth surface |
Light pressure, short strokes |
|
3 |
Shine Block |
Polish top layer |
Optional; once every 2–3 weeks |
|
4 |
Cuticle Oil |
Moisturize |
Lock in hydration |
5. How Often Should You Buff Your Nails?
Buffing is powerful, but moderation is key. Too frequent buffing can thin your nails and make them prone to breakage.
Recommended routine:
Once a week: Light surface buff with 240–600 grit.
Every 2–3 weeks: Optional high-shine buff.
After every manicure removal: Gentle smooth-out to restore evenness.
If your nails feel warm, sensitive, or start showing white patches, that’s a sign to stop.
Think of buffing like exfoliation — a little keeps things healthy, too much wears things down.
6. The Benefits of Nail Buffing (Beyond Shine)
Many people think of buffing as a cosmetic step, but it’s actually one of the healthiest habits for your nails when done right.
Here’s what it really does:
Improves circulation: Gentle friction increases micro-blood flow.
Reduces polish streaks: Smooth surfaces reflect light evenly.
Encourages natural nail growth: Healthier beds = faster growth.
Restores natural shine: Ideal for minimalists who love bare nails.
Removes surface staining: Great for recovering from dark polish use.
Meski’s Professional Nail Buffer is designed with salon-quality fine grit that polishes without thinning, giving natural nails a clean, smooth glow that lasts — even without color.
7. The Mistakes That Damage More Than They Help
Even something as gentle as buffing can backfire if done wrong.
Top buffing mistakes to avoid:
Using a coarse buffer meant for acrylics on natural nails.
Buffing too often or with too much pressure.
Skipping hydration afterward.
Reusing old, worn-out buffers that collect bacteria.
Buffing wet nails (weakened keratin = more damage).
How to avoid them:
Replace buffers every 2–3 months for personal use — or sooner if you buff frequently. Keep them clean and dry between uses, and always sanitize if shared.
|
Mistake |
Why It’s Bad |
Easy Fix |
|---|---|---|
|
Over-buffing |
Thins and weakens nails |
Limit to 1–2 times/week |
|
Wet buffing |
Softens keratin |
Always dry nails first |
|
Wrong grit |
Too coarse = damage |
Use 240+ grit only |
|
Old tool |
Harbors bacteria |
Replace every few months |
|
No hydration |
Causes peeling |
Apply cuticle oil immediately |
8. How Buffing Fits Into Your Full Nail Routine
Buffing isn’t a stand-alone step — it’s the bridge between care and polish.
Here’s how it fits into your Meski-approved nail routine:
|
Step |
Product |
Function |
Why It Matters |
|---|---|---|---|
|
1 |
Hand Wash |
Cleanse |
Removes oils and dirt |
|
2 |
Nail File |
Shape |
Defines nail edges |
|
3 |
Professional Nail Buffer |
Smooth |
Creates ideal surface for color |
|
4 |
Foundation Base |
Prime |
Strengthens and preps for polish |
|
5 |
Color Polish |
Beautify |
Adds your personal style |
|
6 |
Crystal Top Coat |
Seal |
Locks in shine and durability |
|
7 |
Cuticle Oil Pen |
Hydrate |
Keeps nails flexible and strong |
Following this structure ensures every product performs at its best — especially your buffer, which sets the base for everything else.
9. For Natural Nail Lovers: Buffing Without Polish
If you prefer going polish-free or giving your nails a break between colors, buffing is the easiest way to maintain a clean, professional look naturally.
The minimalist routine:
Buff lightly with 600–1200 grit.
Polish with ultra-fine grit or shine side.
Apply cuticle oil and hand cream.
The result: healthy-looking, glossy nails that need no color — just confidence.
Bonus: Regular buffing reduces the need for artificial shine products and helps nails grow stronger naturally.
10. Comparing Nail Buffers: Foam, Block, and Electric
Not all buffers are created equal.
|
Type |
Description |
Pros |
Cons |
|---|---|---|---|
|
Foam Buffer |
Flexible, multi-grit surface |
Lightweight, beginner-friendly |
Wears out faster |
|
Block Buffer |
Firm, multi-sided cube |
Multiple functions, long-lasting |
Slightly less precise |
|
Electric Buffer |
Motorized tool |
Fast for professionals |
Requires skill & control |
Meski recommendation: Stick to manual foam or block buffers for home use. They give better control and reduce the risk of over-thinning the nail plate.
11. How to Care for Your Buffer
To keep your buffer hygienic and effective:
Wipe clean with alcohol after every use.
Let it air dry before storing.
Store in a dry area away from moisture.
Replace when the surface feels smooth — it’s no longer doing its job.
Proper tool care ensures your nail buffing always improves, not harms, your nail health.
Smooth Nails, Confident Hands
Your nails say a lot about you — but it’s not just about polish or color. It’s about how you care for the little details that others might overlook.
Buffing may seem simple, but it’s a quiet art — the difference between ordinary nails and nails that glow naturally. When you treat your nail surface with care, every layer that follows performs better — base, color, and top coat.
At Meski, our mission is to simplify nail care so you can feel confident every day — whether you wear bright colors, neutrals, or none at all.
So next time you start your manicure, take a few extra seconds to buff. Smooth nails aren’t just about looks — they’re about care, patience, and pride in the small steps that make the biggest difference.
Because true shine doesn’t just come from polish. It starts from the surface — and the care you give it.


